
Reporting on your students' progress
Viewing a report
Section titled “Viewing a report”All report data is updated in real time.
- Go to the Reports page.
- Select a Cohort.
- Tap the type of report that you want to view.
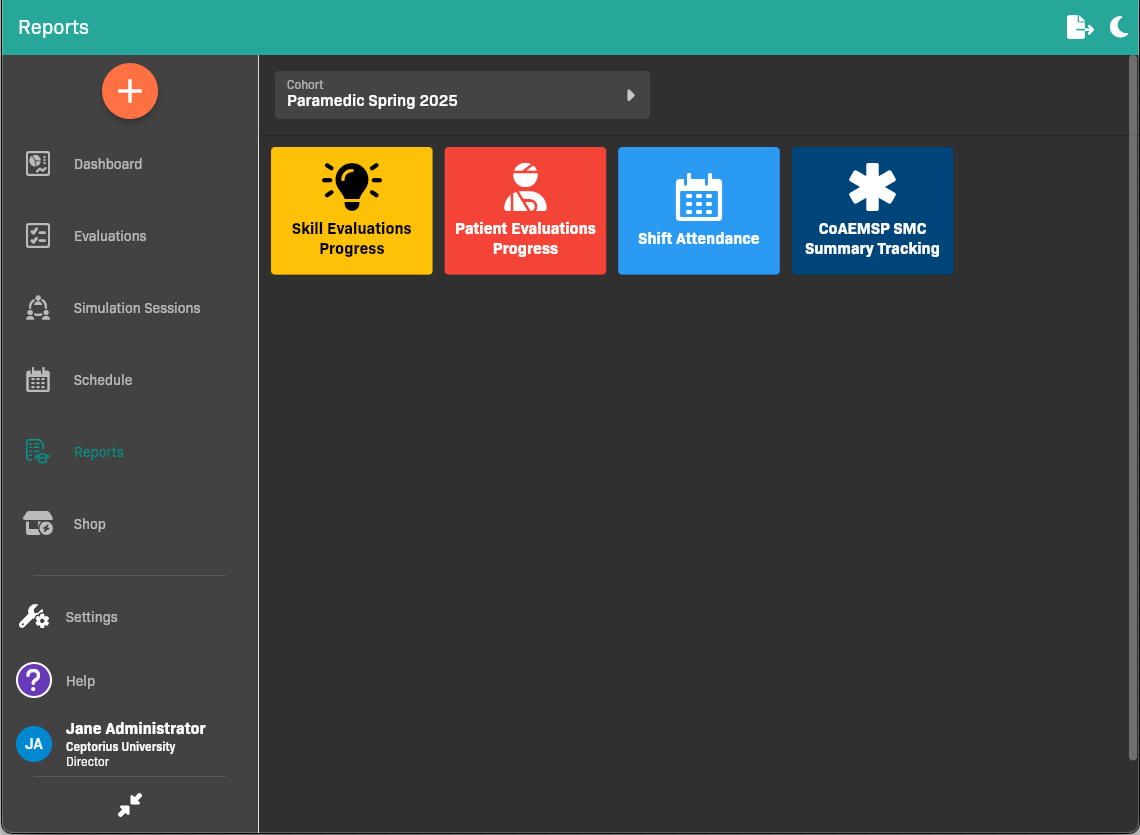
Reports page
- Select the students that you’d like to report on.
- In the top right corner, tap .
- Tap Pick Students.
- Select individual students, or tap Select All.
Working with Evaluation Progress reports
Section titled “Working with Evaluation Progress reports”The Skill Evaluations Progress report and Patient Evaluations Progress reports have a similar format and viewing options.
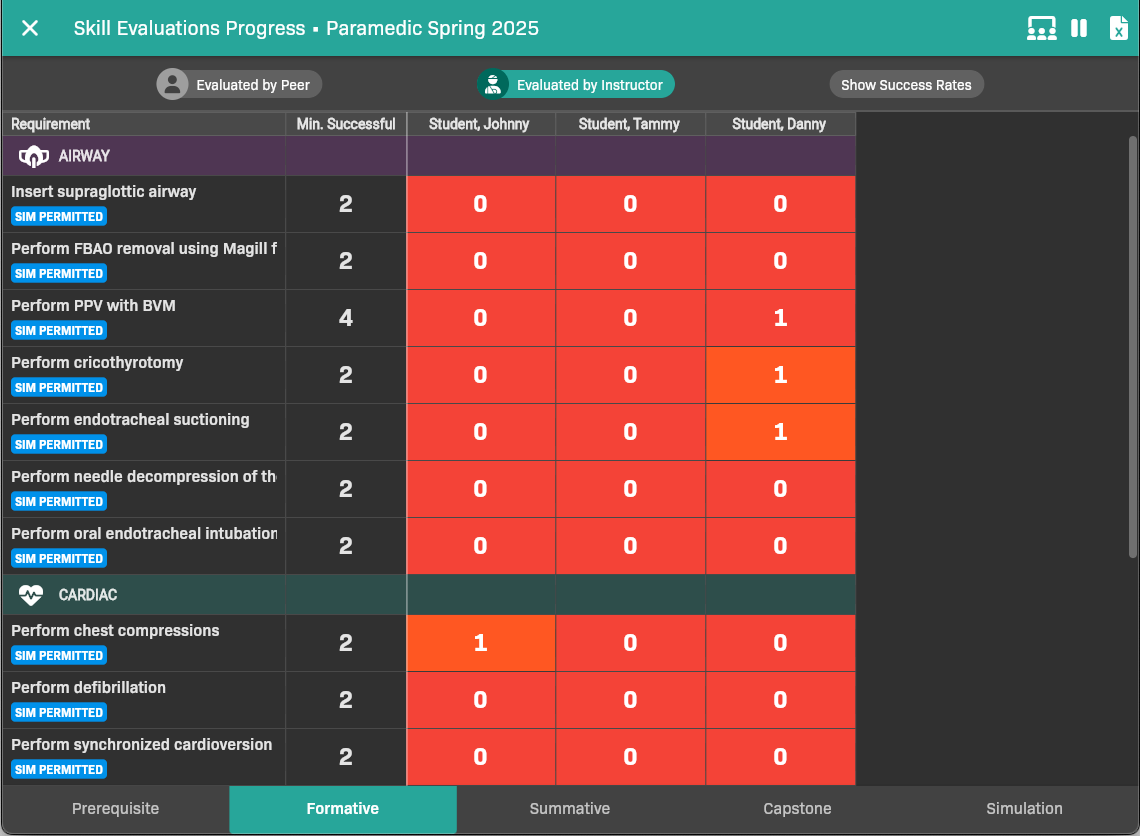
Skill Evaluations Progress report
View data for a specific learning phase
Section titled “View data for a specific learning phase”Use the tabs at the bottom of the screen to view evaluation data for each learning phase.
View evaluations that counted towards a requirement
Section titled “View evaluations that counted towards a requirement”To view the specific evaluations that counted towards a requirement, tap the count in the [student’s name] column.
If the count is 0, tapping it opens a Why 0? panel instead of an empty evaluation list. The panel shows:
- The phase-specific conditions an evaluation must meet.
- What has counted for the student in other learning phases and evaluator-role columns.
- A button for viewing the requirement’s complete specification.
This can reveal, for example, that the student’s evaluations counted as Formative rather than Summative or were signed by a different evaluator role.
Filter by evaluator type
Section titled “Filter by evaluator type”- To view peer evaluations, tap Evaluated by Peer.
- To view instructor evaluations, tap Evaluated by Instructor.
Show success rates
Section titled “Show success rates”Tap Show Success Rates to show the percentage of evaluations that were successful for each requirement.
Export to Excel
Section titled “Export to Excel”In the top-right corner, tap . The file downloads to your device. Every worksheet begins with the Program, Certification Level, and Cohort so a printed or shared sheet retains its context.
Working with the shifts report
Section titled “Working with the shifts report”The Shift Attendance report shows scheduled hours versus attended hours.
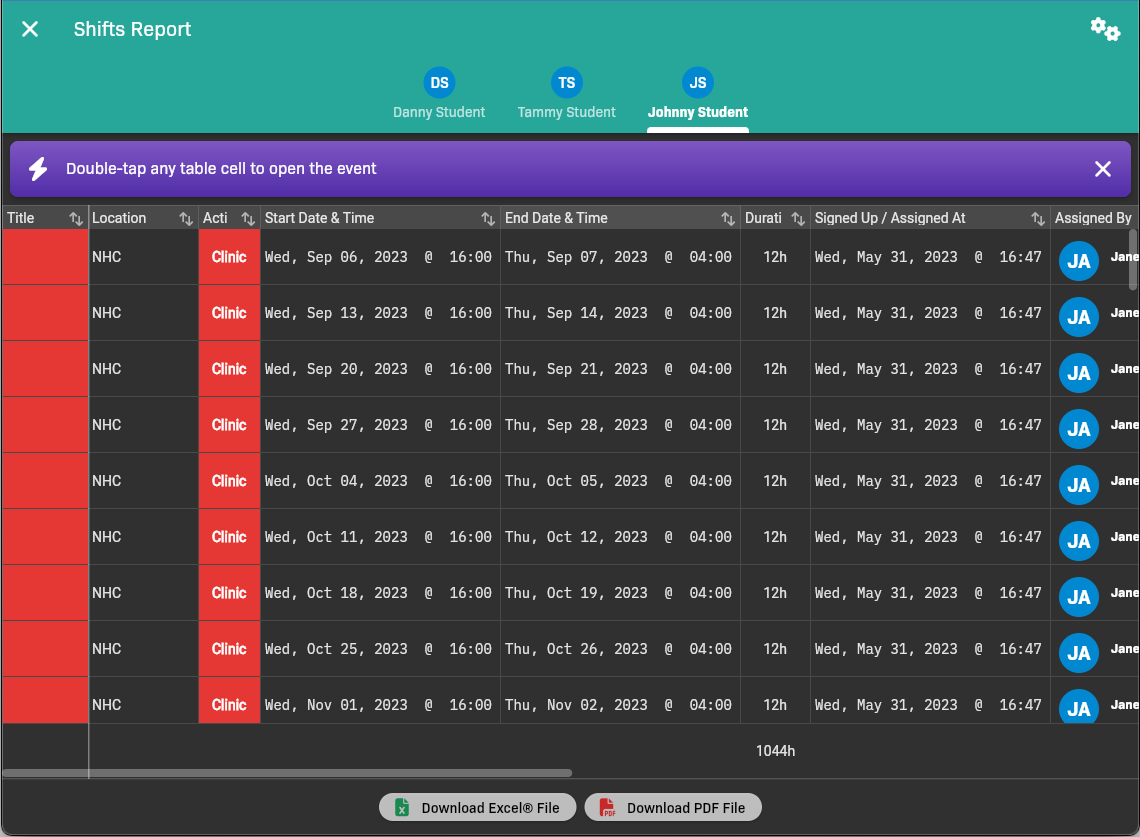
Shifts Report
Understand attendance labels
Section titled “Understand attendance labels”Attendance labels use the current Attendance Rules for the student’s organization and program. The clock-in window and arrival and departure thresholds are configurable; the default late-arrival grace is five minutes after the start.
| Label or state | What it means |
|---|---|
| Early / On-Time / Late arrival | The clock-in falls in the corresponding window under the student’s effective rules. |
| Clocked In | There is a clock-in, and a clock-out is not yet overdue. |
| Missing Clock-Out | A clock-out is expected under the effective rules but has not been recorded. |
| Early / On-Time departure | The clock-out falls in the corresponding departure window. |
| Late Departure | Late clock-out classification is enabled and the punch is after its grace period. |
| Absent | The student was marked absent; the record may be Excused, Unexcused, or an unspecified older absence. |
| No Clock Punches | Neither a clock-in nor a clock-out is recorded. |
A record with both punches is complete even if departure was late. Changing Attendance Rules can relabel earlier records without changing saved times or actual attended hours. See Understanding clock-out status for grace-period examples.
Attended hours use elapsed time between clock-in and clock-out. Missing punches do not become attended hours just because the event has a scheduled duration. The evaluation-status column is separate from attendance status.
Scheduled hours and absences
Section titled “Scheduled hours and absences”Open the report parameters and use Scheduled hours to choose:
- Include all scheduled hours — include absent occurrences in scheduled totals.
- Exclude excused absences — exclude only occurrences classified Excused.
- Exclude all absences — exclude all absent occurrences, including older unspecified absences.
Absent rows remain visible in every mode. The choice changes their contribution to scheduled hours, not actual attended hours. The selected calculation is shown with the report parameters and applies to the screen and Excel/PDF exports.
View data for a particular student
Section titled “View data for a particular student”Use the tabs to select the student for whom you want to view shift data.
Filter the shifts report
Section titled “Filter the shifts report”You can filter shifts by Learning Activities, Start Date / Time, End Date / Time, and students.
Tap in the top-left corner of the screen to access filtering parameters.
View an event’s details
Section titled “View an event’s details”Double-tap on a row to view details for that event.
Export
Section titled “Export”Tap Download Excel File or Download PDF File to download the file to your device.
Using the Data Export to build your own reports
Section titled “Using the Data Export to build your own reports”If you need to access evaluation data that isn’t provided by one of the predefined reports, you can use the Data Export to export the needed data, then manipulate it in a spreadsheet application like Microsoft Excel.
Step 1: Export the needed data
Section titled “Step 1: Export the needed data”By default, all data in the selected cohort is exported. You have the option to filter by student, learning activities, evaluation type, and time range.
-
Go to the Reports page.
-
Select a Cohort.
-
Tap the Data Export card.
-
Tap Parameters to select the data you need to export. All filtering parameters are optional except Cohort.
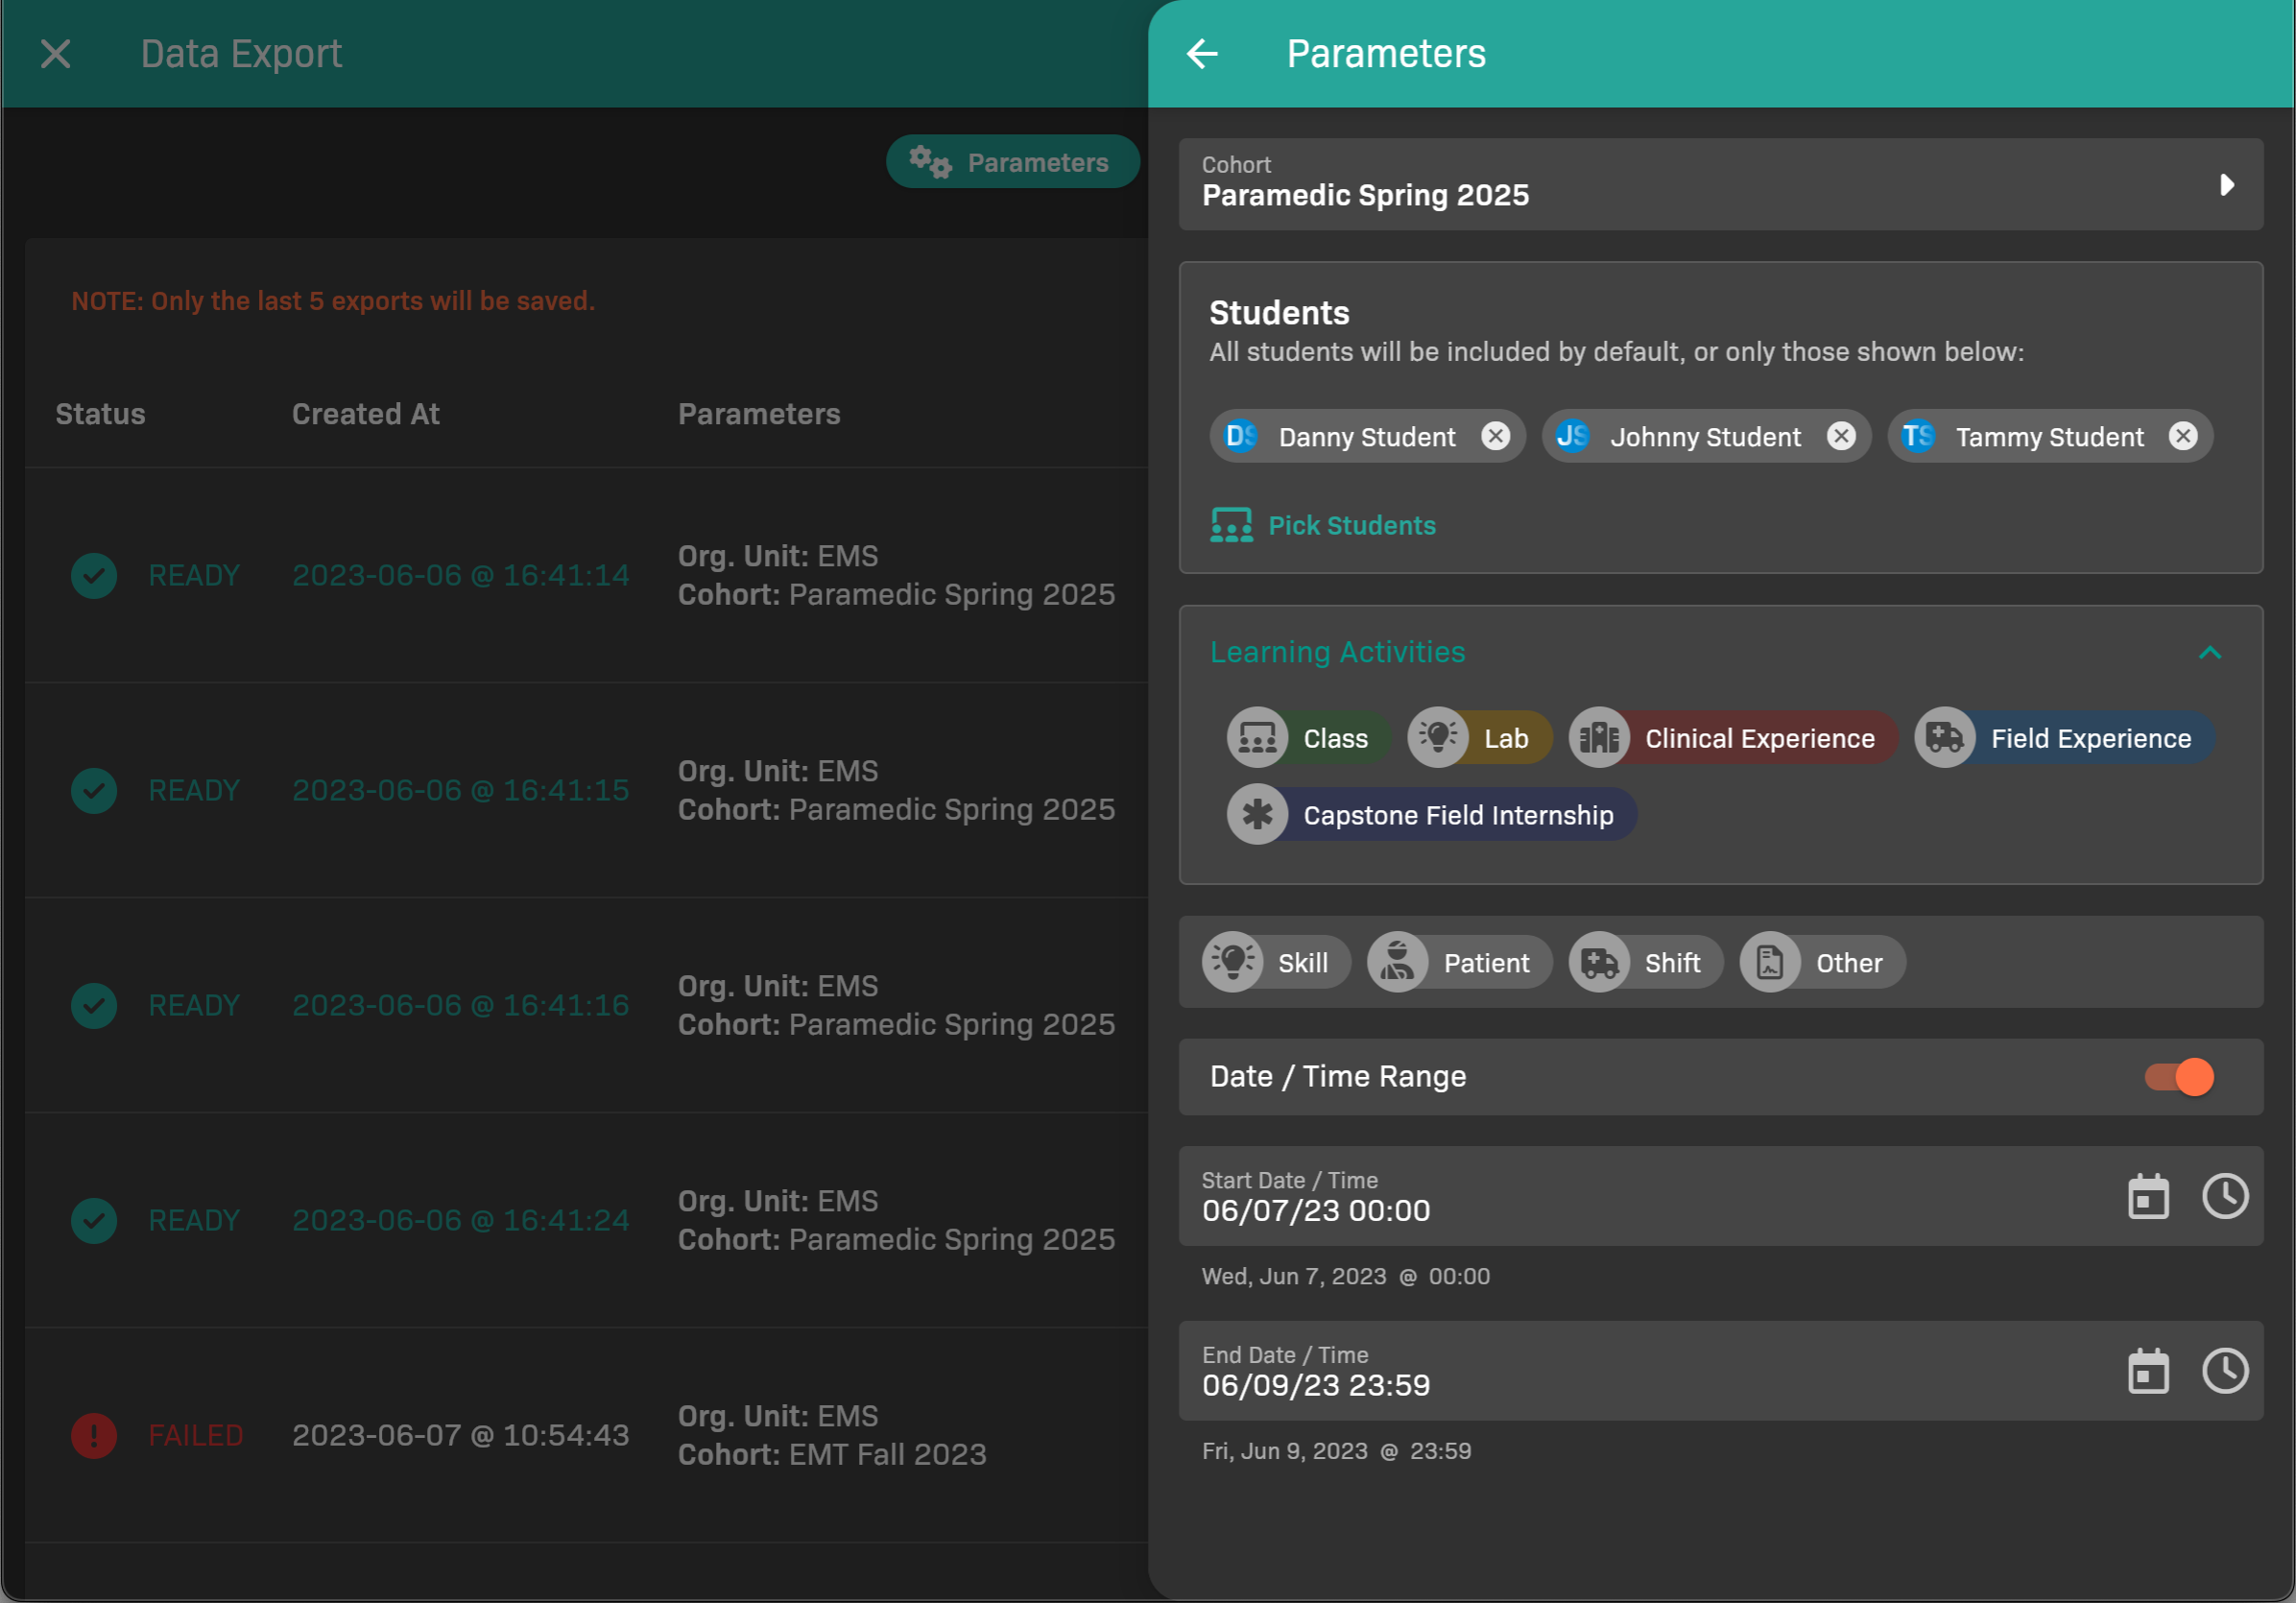
Data Export Parameters
- Change the Cohort, if needed.
- Select the Students to include; by default all students in the cohort are selected. Tap Pick Students to change selection.
- Select the Learning Activities to include.
- Select the evaluation type(s) to include (Skill, Patient, Shift, Other).
- To filter by when the evaluation occurred, enable Date / Time Range, then set Start and End.
- When you’re finished, tap .
-
Tap New Export.
Your export is generated in the background.
Step 2: Download the export when it’s ready
Section titled “Step 2: Download the export when it’s ready”When your export is ready, it appears in the list of exports on the Data Export page.
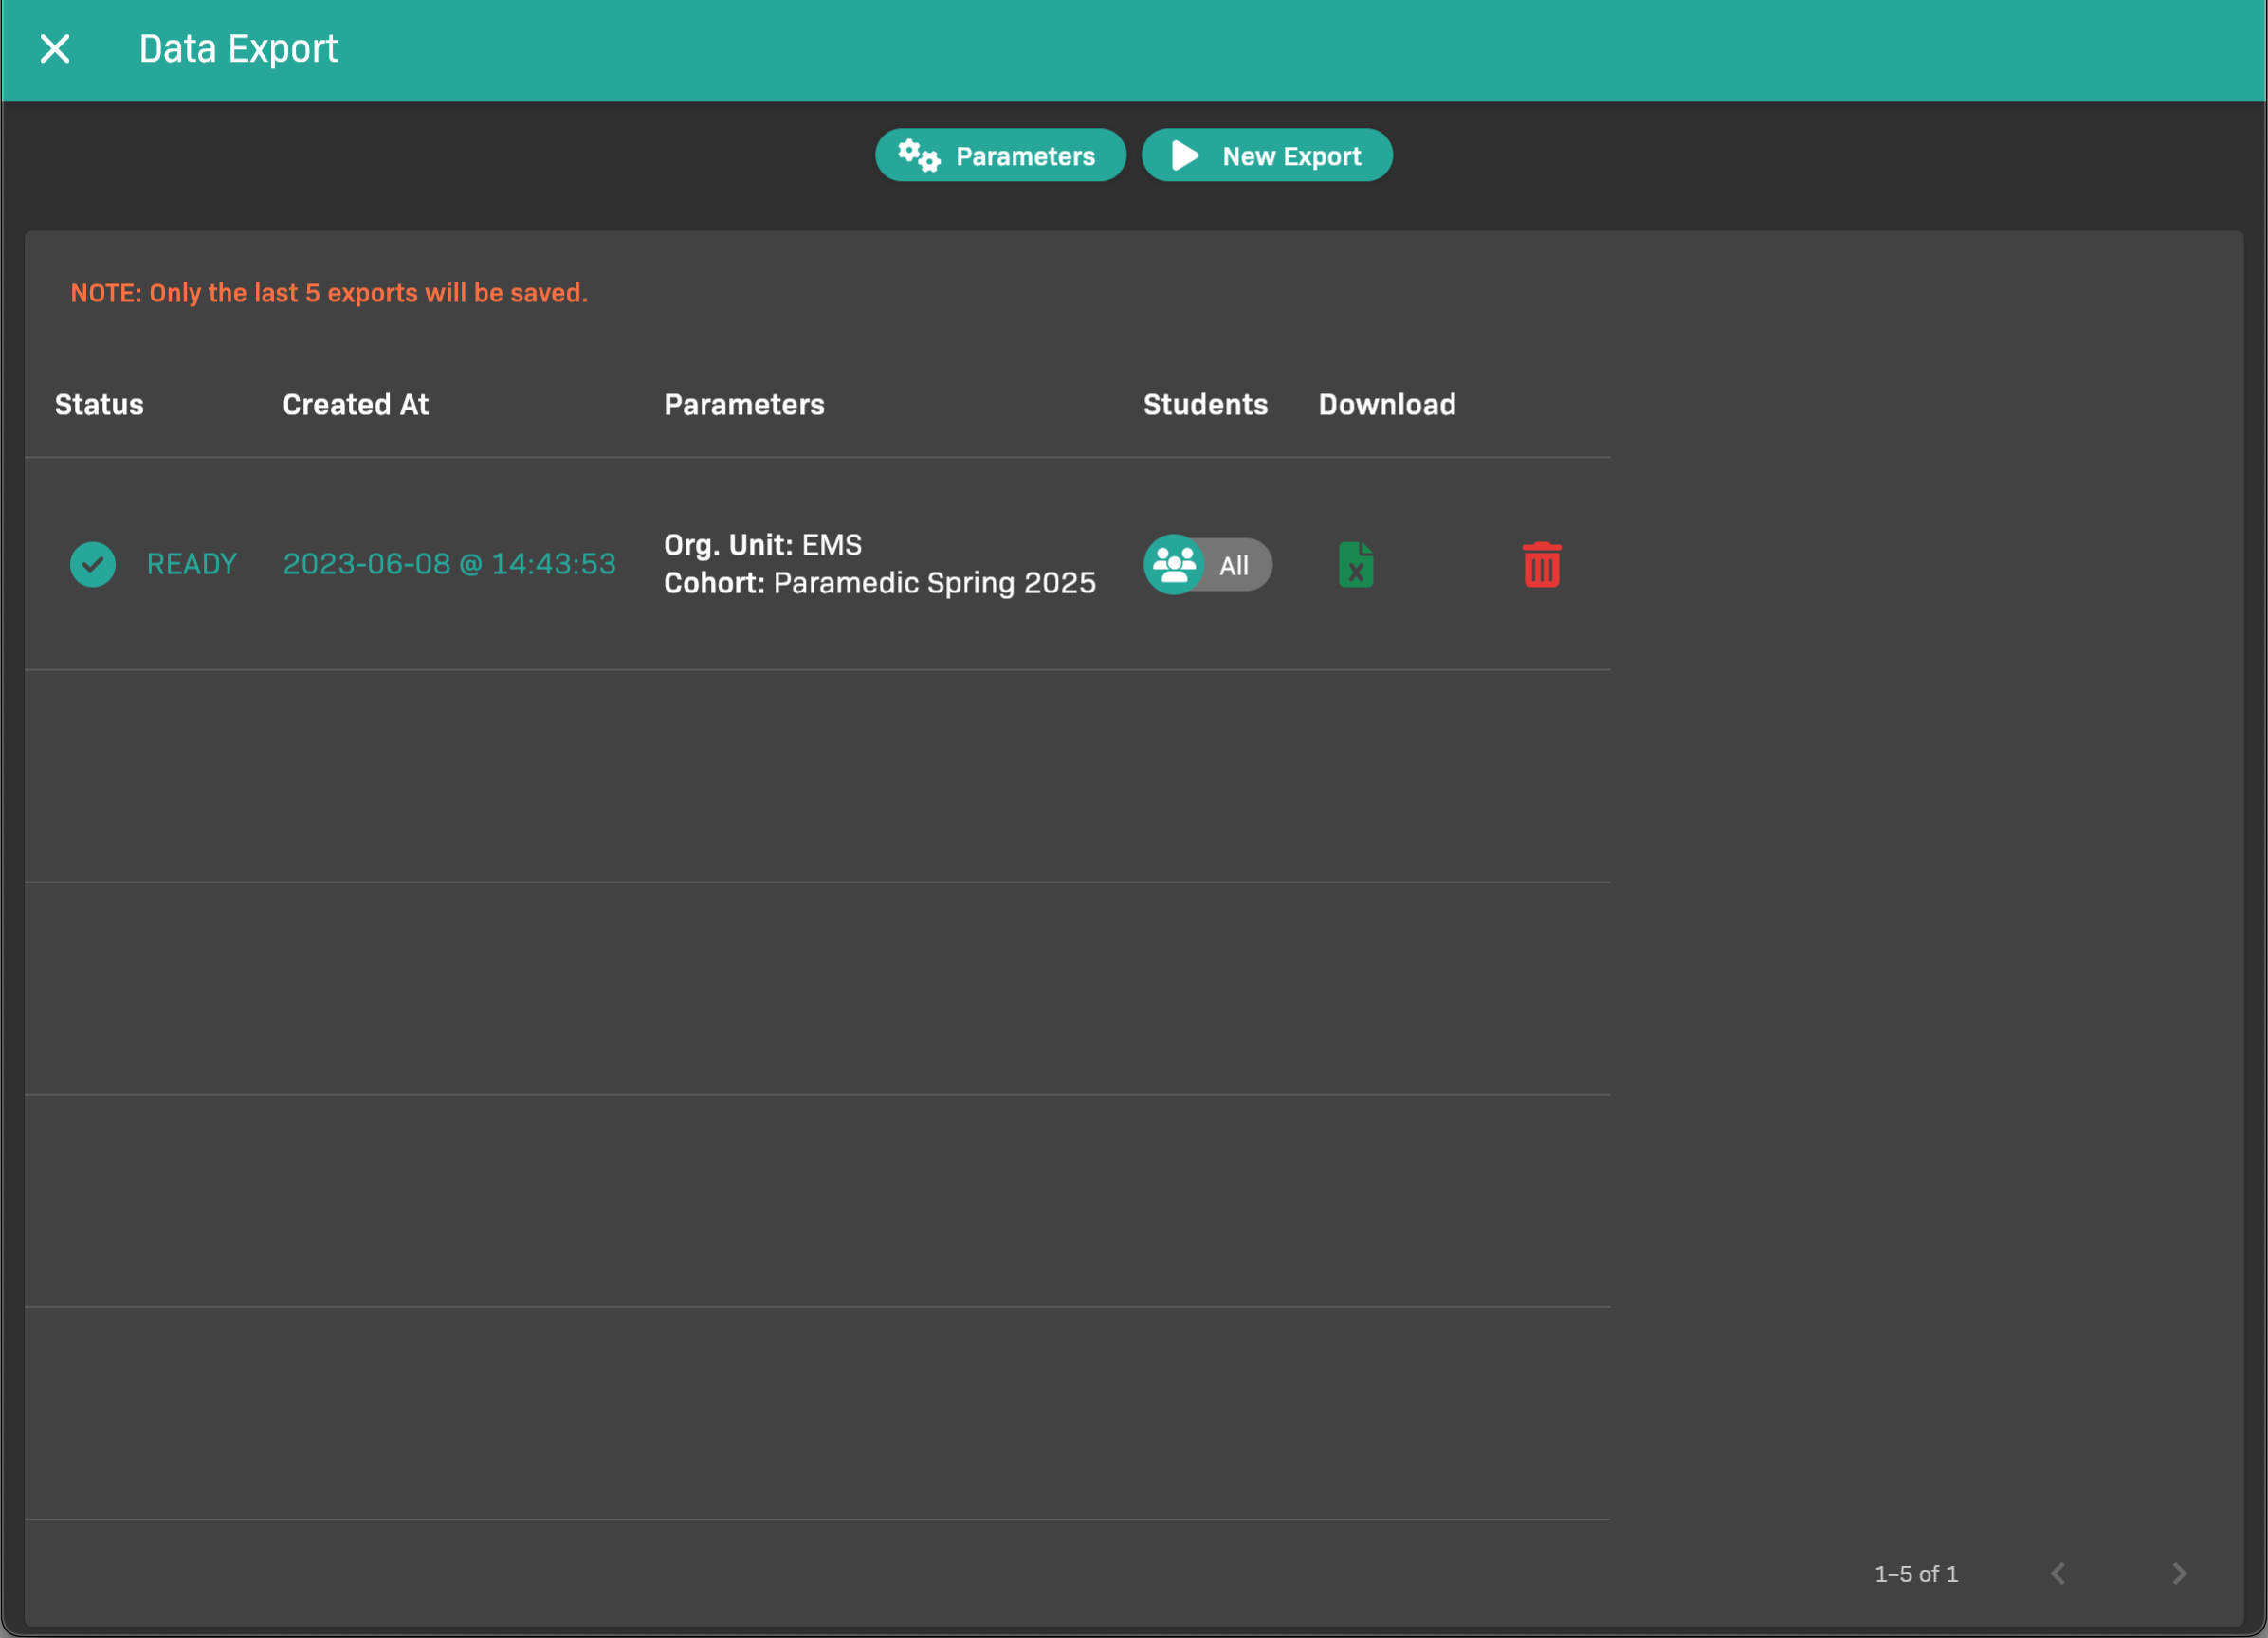
Completed Data Exports
To download a generated report, tap in the Download column.
Step 3: Customize in a spreadsheet application
Section titled “Step 3: Customize in a spreadsheet application”Use the spreadsheet application of your choice to open the file you downloaded in the previous step.